pfSense has had difficult times with WireGuard, but that’s changing quite fast these days. Now, pfSense has a good stable package for WireGuard which can be used in home/homelab setup (I wouldn’t use it in a production environment, yet).
Let’s put the high-level details on what we will be doing here:
- Enable (experimental) support for WireGuard in AirVPN
- Download config file from AirVPN
- Install WireGuard package in pfSense
- Configure WireGuard settings in pfSense
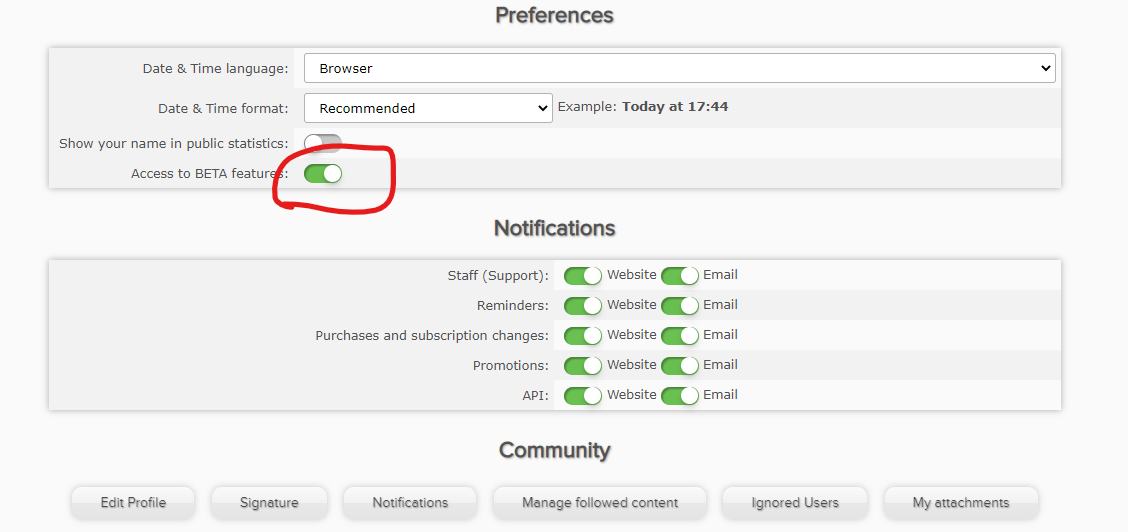
1. Enable (experimental) support for WireGuard in AirVPN
Go to Airvpn Preferences and enable Access to BETA features
2. Download config file from AirVPN
Now, goto Config generator and you can see WireGuard available for selection
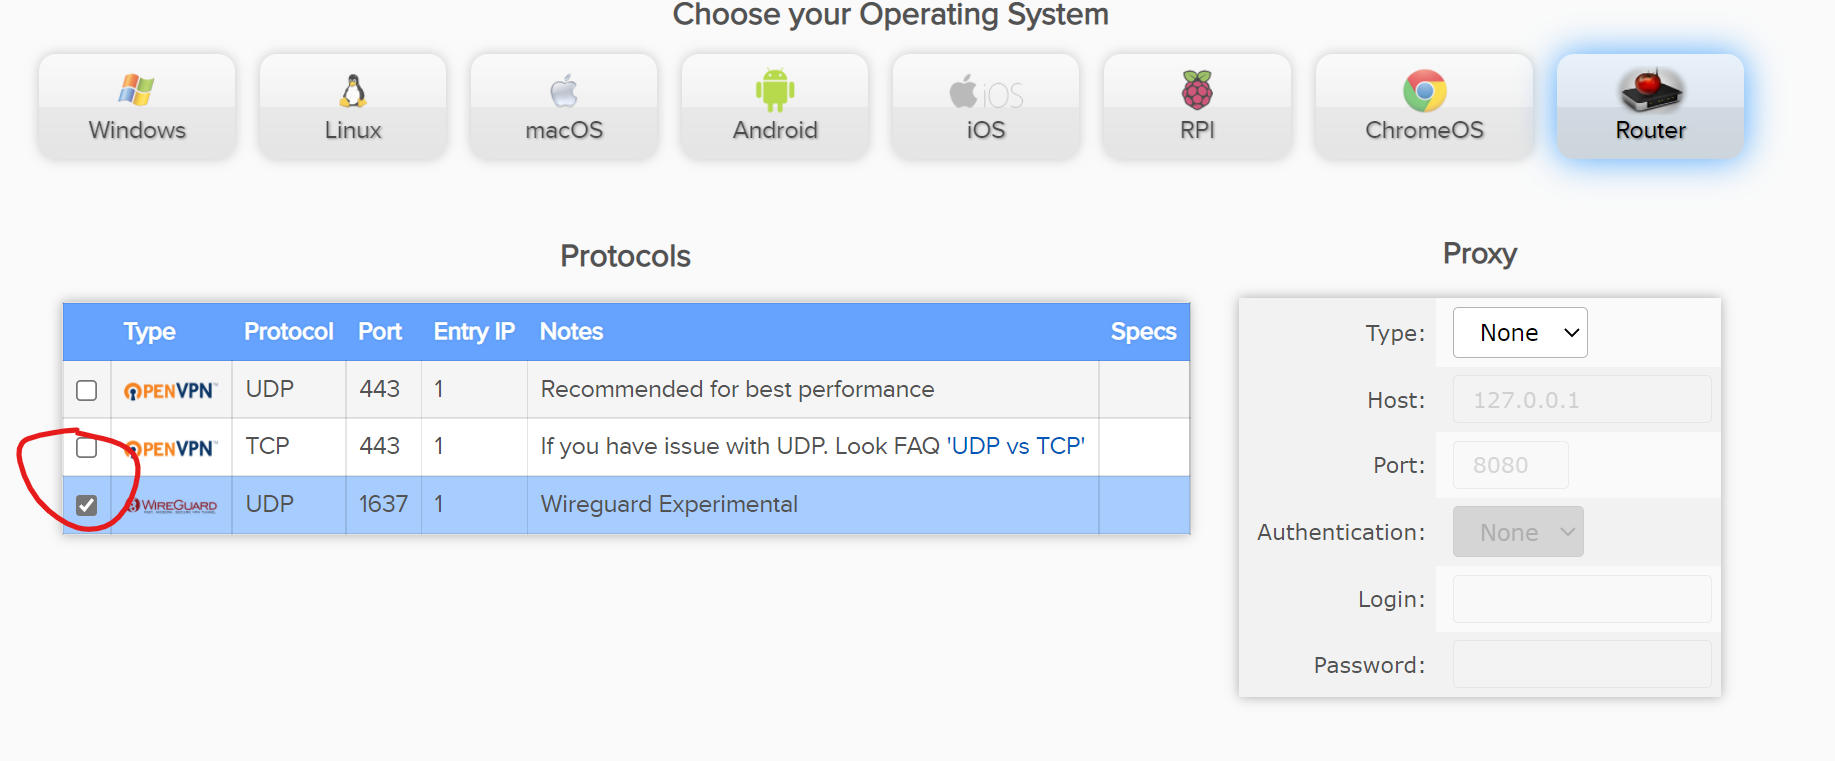
Then, click Download in the bottom of the page after making your server selection.
3. Install WireGuard package in pfSense
Now log into PFSENSE. Go to System > Package Manager and make sure you have Wireguard installed
 If you don’t, just click “Available Packages” and search for Wireguard, and install it.
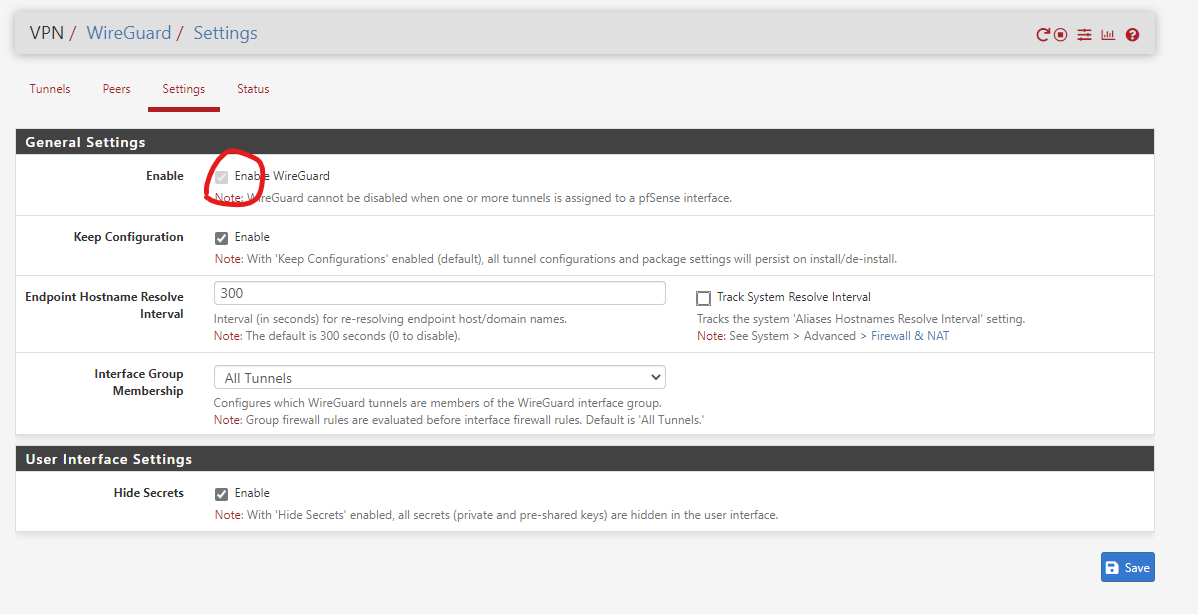
4. Configure WireGuard settings in pfSense
Now in the top bar, go to VPN > Wireguard > Settings and make sure its enabled.
To configure further, you will need to uses the data present in the file downloaded in step 2.
The file will look like this: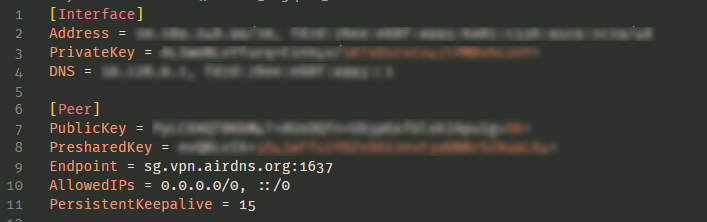
Tunnels
Go to “Tunnels” tab and click “Add Tunnel”.

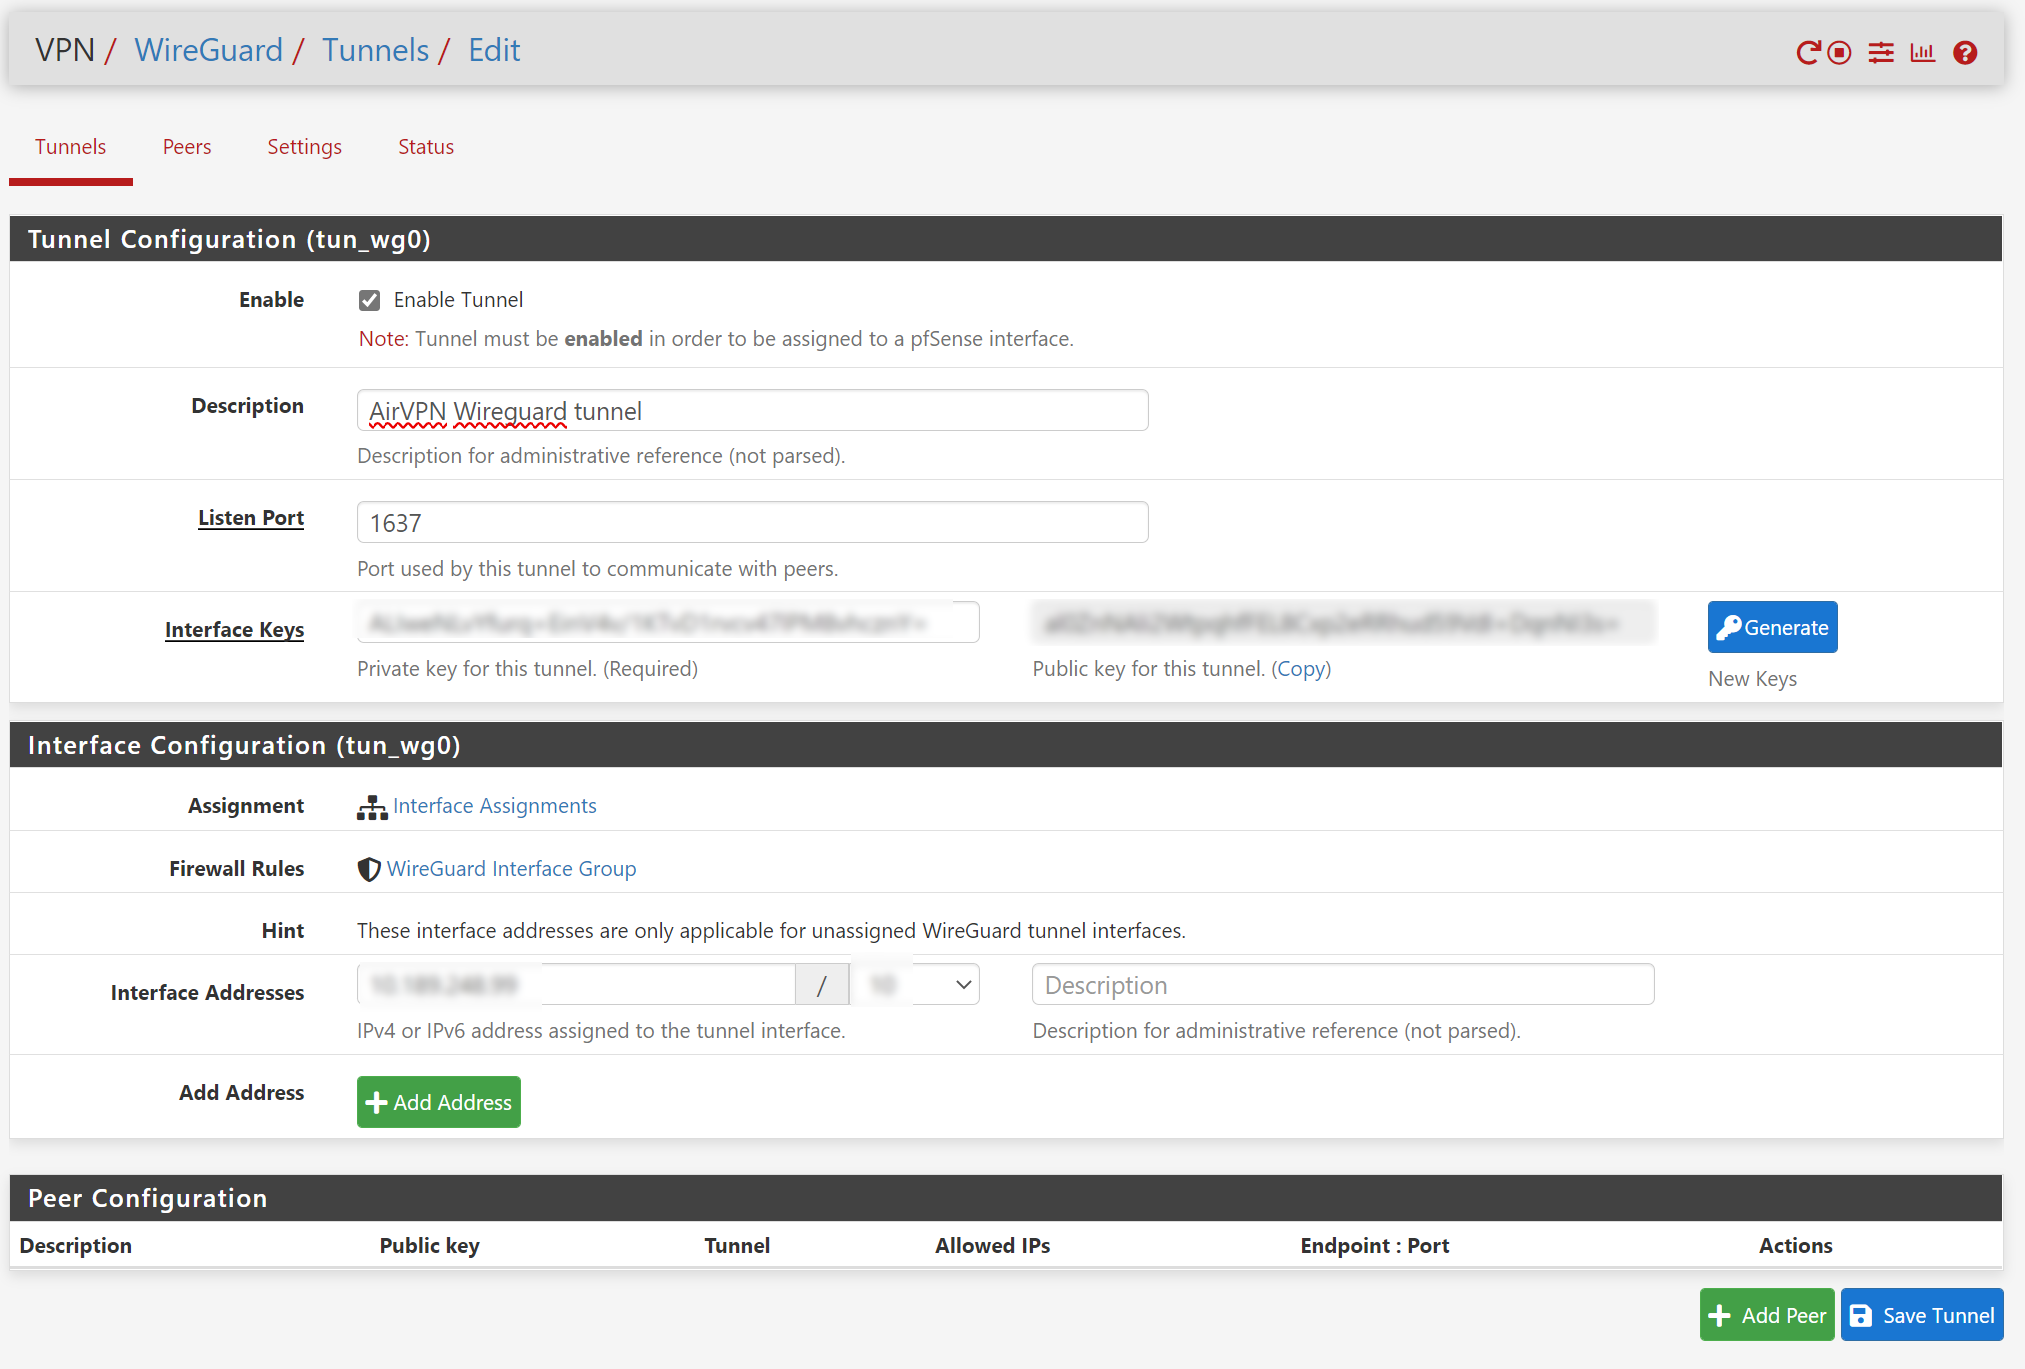
In the “Tunnel Configuration”
- Check “Enable Tunnel”.
- Add a good understandable description like “AirVPN Wireguard tunnel”.
- Set the “Listen port” to the value present in the “Endpoint” field of the config. In my case, it is 1637.
- In “Interface Keys”, copy and paste the “PrivateKey” field from config and press tab key. You should see the “Public Key” text auto filled.
In the “Interface Configuration”
- Enter “Interface Address” and the CIDR value from config’s Interface section.
CIDR act as subnet mask. Read more about it here.
Save the tunnel configuration by clicking “Save Tunnel”.
Final tunnel configuration should look something like this.
Peers
Go to “Peers” tab and click “Add Peer”.
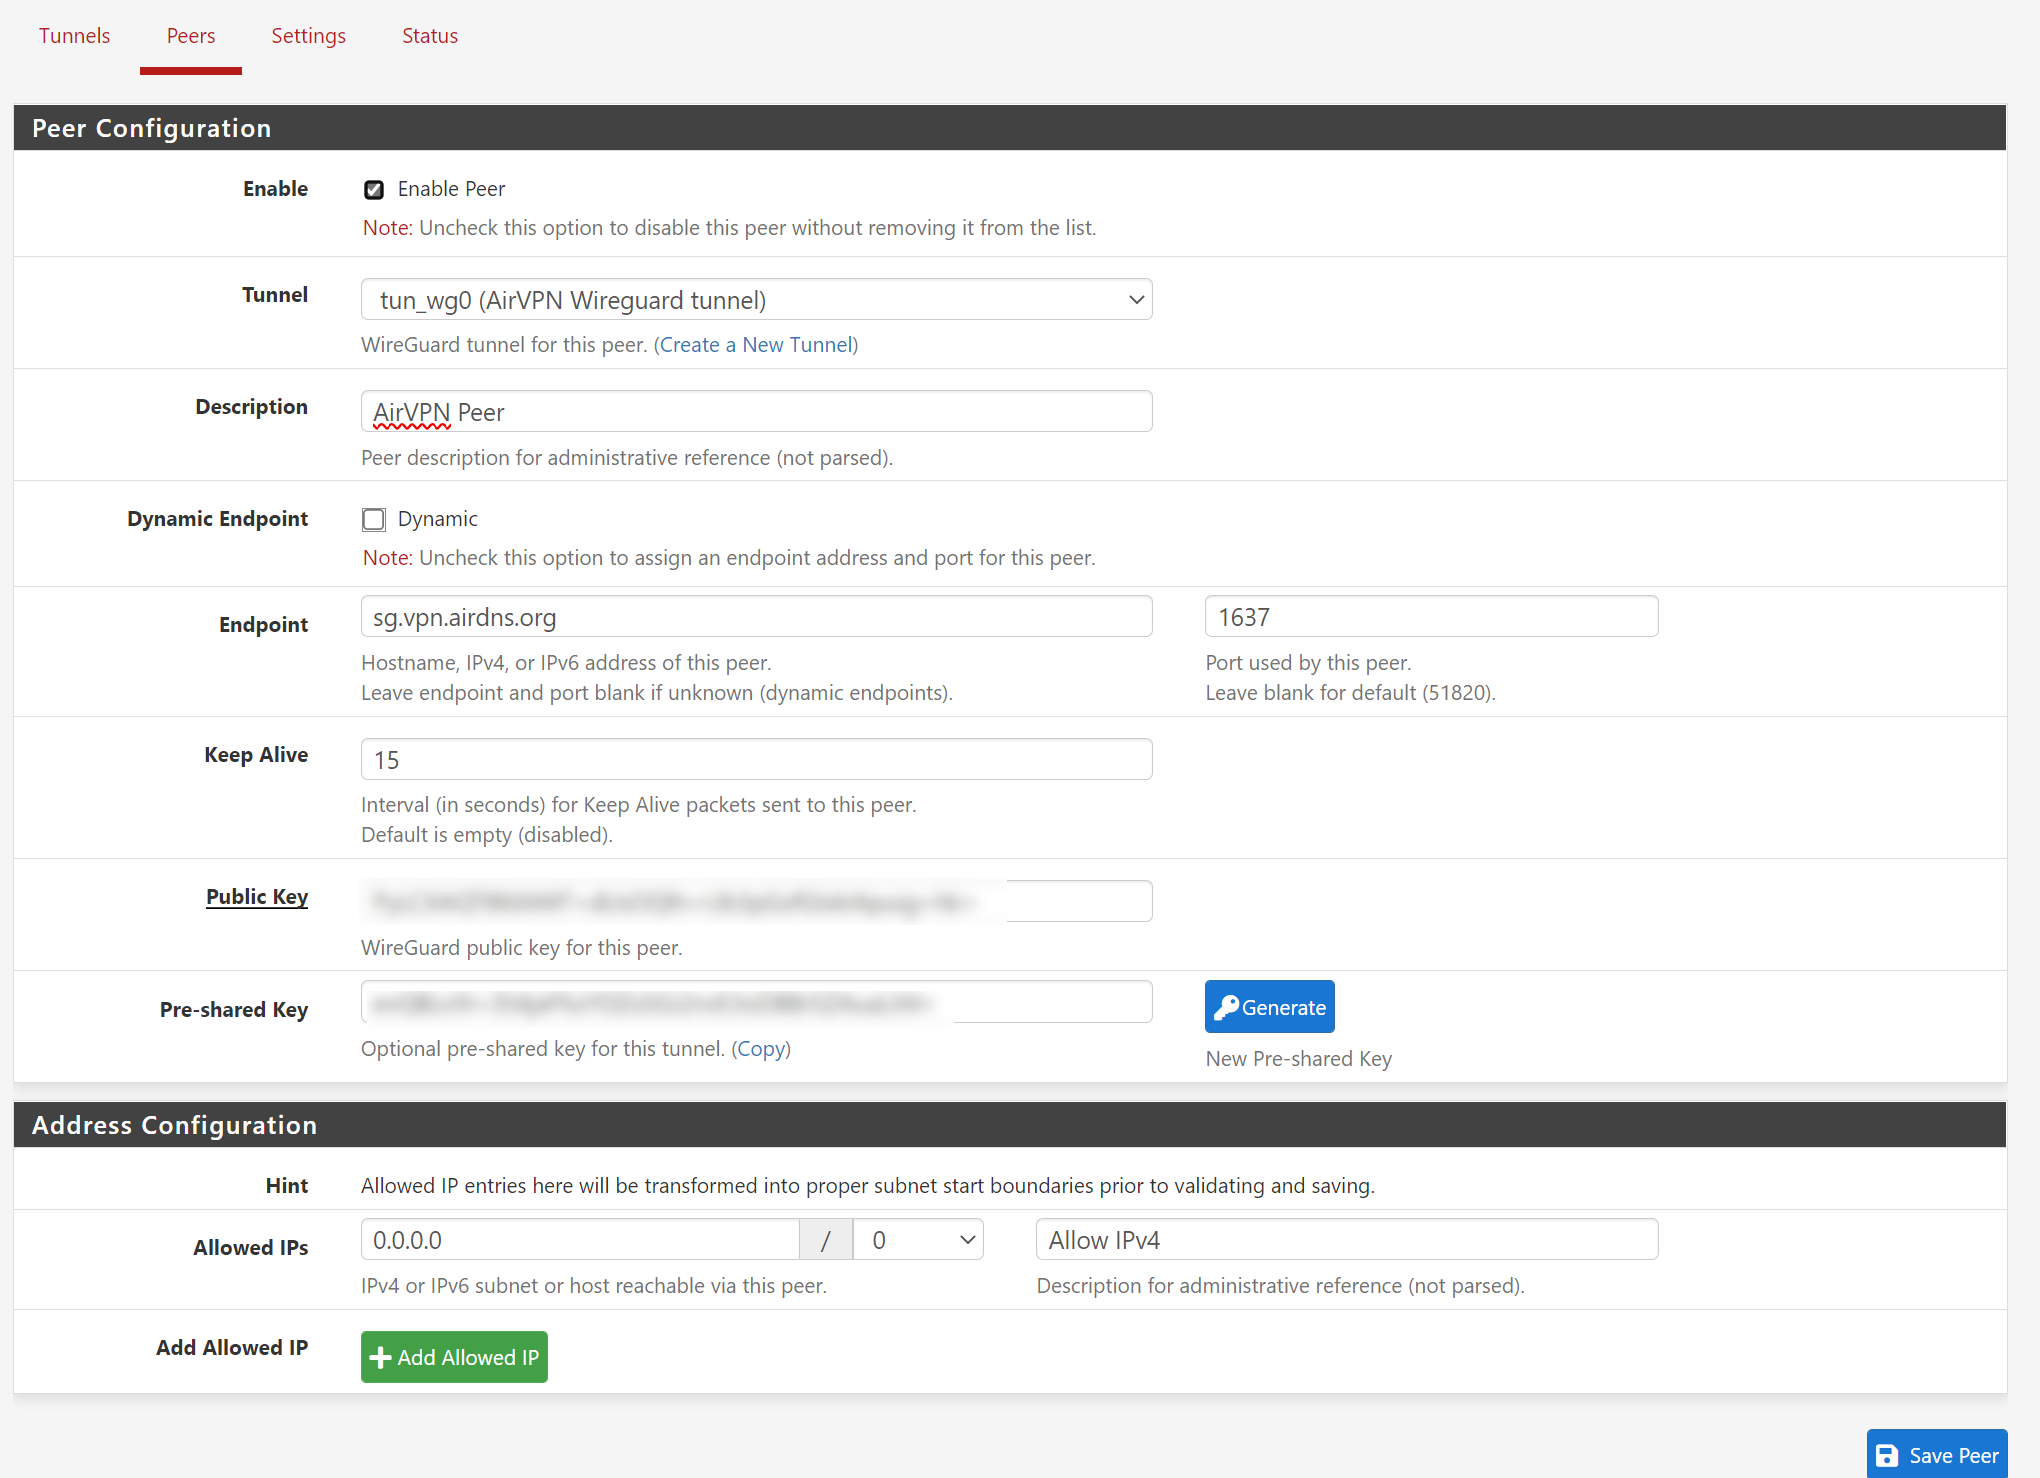
In the “Peer Configuration”
- Check “Enable Peer”
- In “Tunnel”, select the tunnel which was created in previous step.
- Add a good understandable description in “Description”.
- Uncheck “Dynamic” in Dynamic Endpoint.
- Now two new textboxes will appear. Enter the Endpoint (in our case, it’s sg.vpn.airdns.org) and Endpoint port (1637, in our case).
- Keep Alve: 15 (in our case).
- Then copy and paste the “PublicKey” and “PresharedKey” to the respective fields.
In the “Address Configuration”
- Enter 0.0.0.0 in Allowed ip and select “0” for CIDR.
- Add the description “Allow IPv4”.
Save the peer configuration by clicking “Save Peer”.
Final peer configuration should look something like this.
Getting your IP address from AirVPN
Once the above steps are done, pfSense would have connected to AirVPN through WireGuard. But we wouldn’t be able to use it yet as we haven’t configured the Interface yet. Before we proceed for Interface configuration, let’s first get the IP address.
Go to https://airvpn.org/sessions/
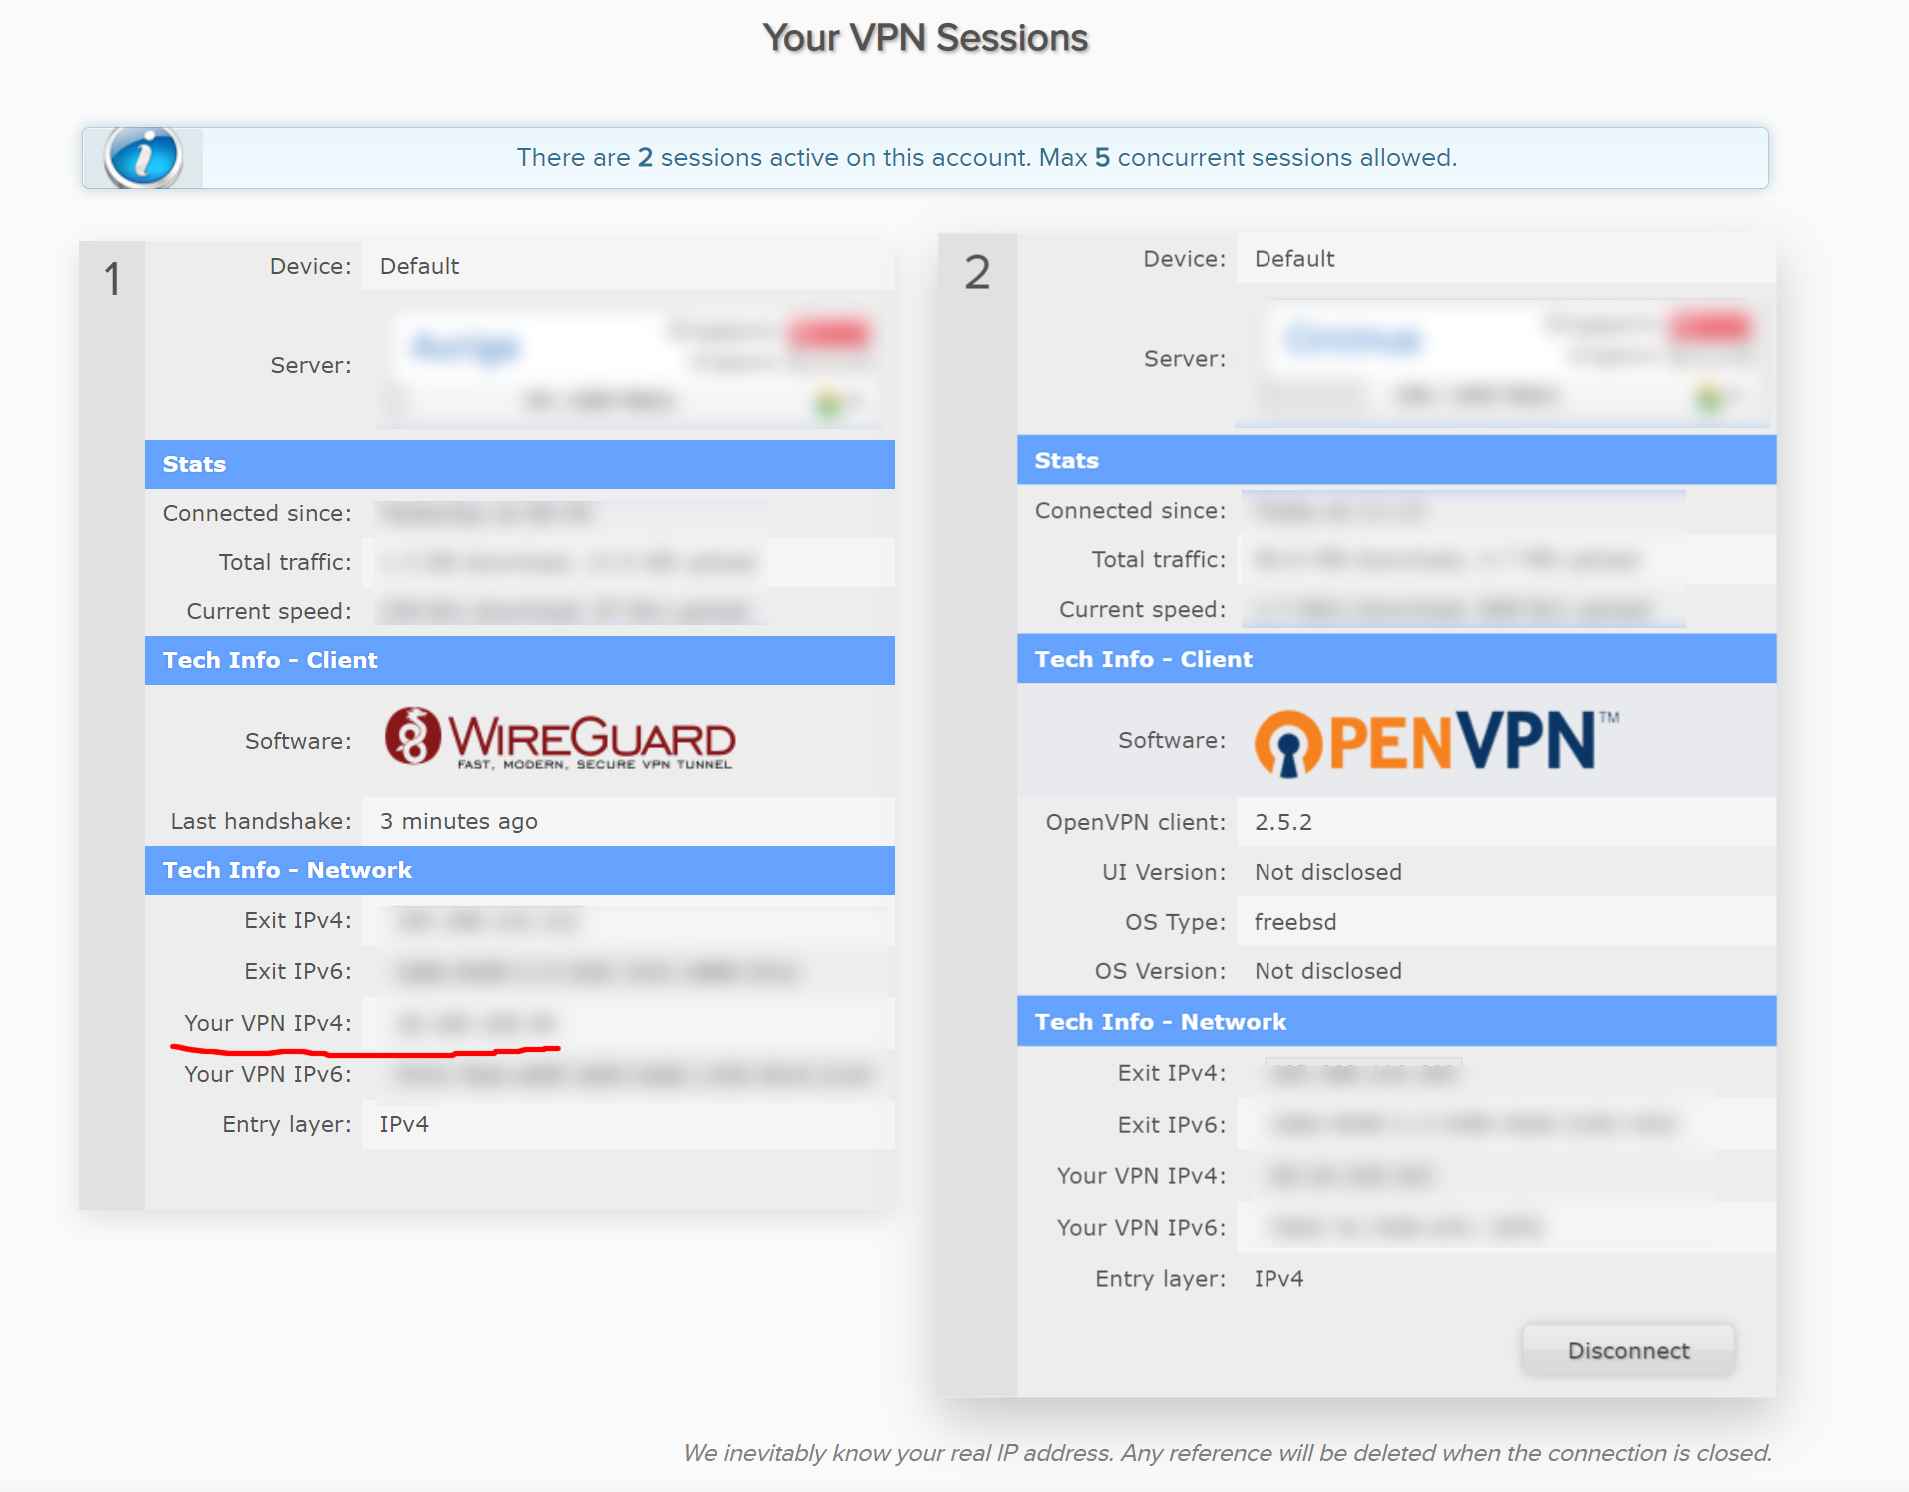 Make note of your VPN IPv4 address.
Note: As far as I observed, AirVPN does not change the ip address after the first assignment. This behaviour can change in the future and I will update this guide if so. I haven't found any other way to get the IP address of the Wireguard connection.
Interface Assignments
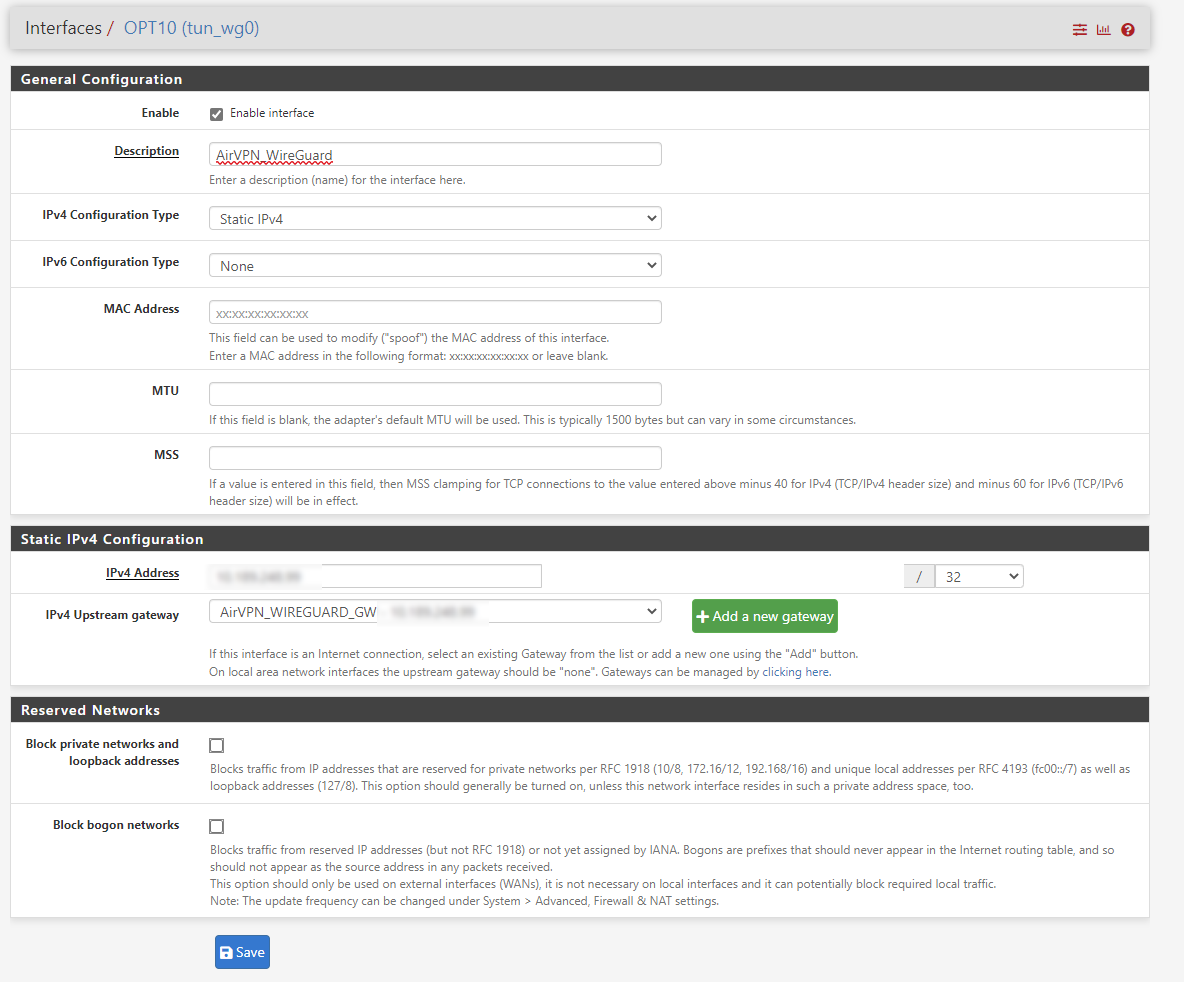
When you created a tunnel (following the steps above), you would see a new Interface in pfSense. On top bar, go to Interfaces > Assignments You will see a new interface at the bottom of the list, likely named “tun_wg0”
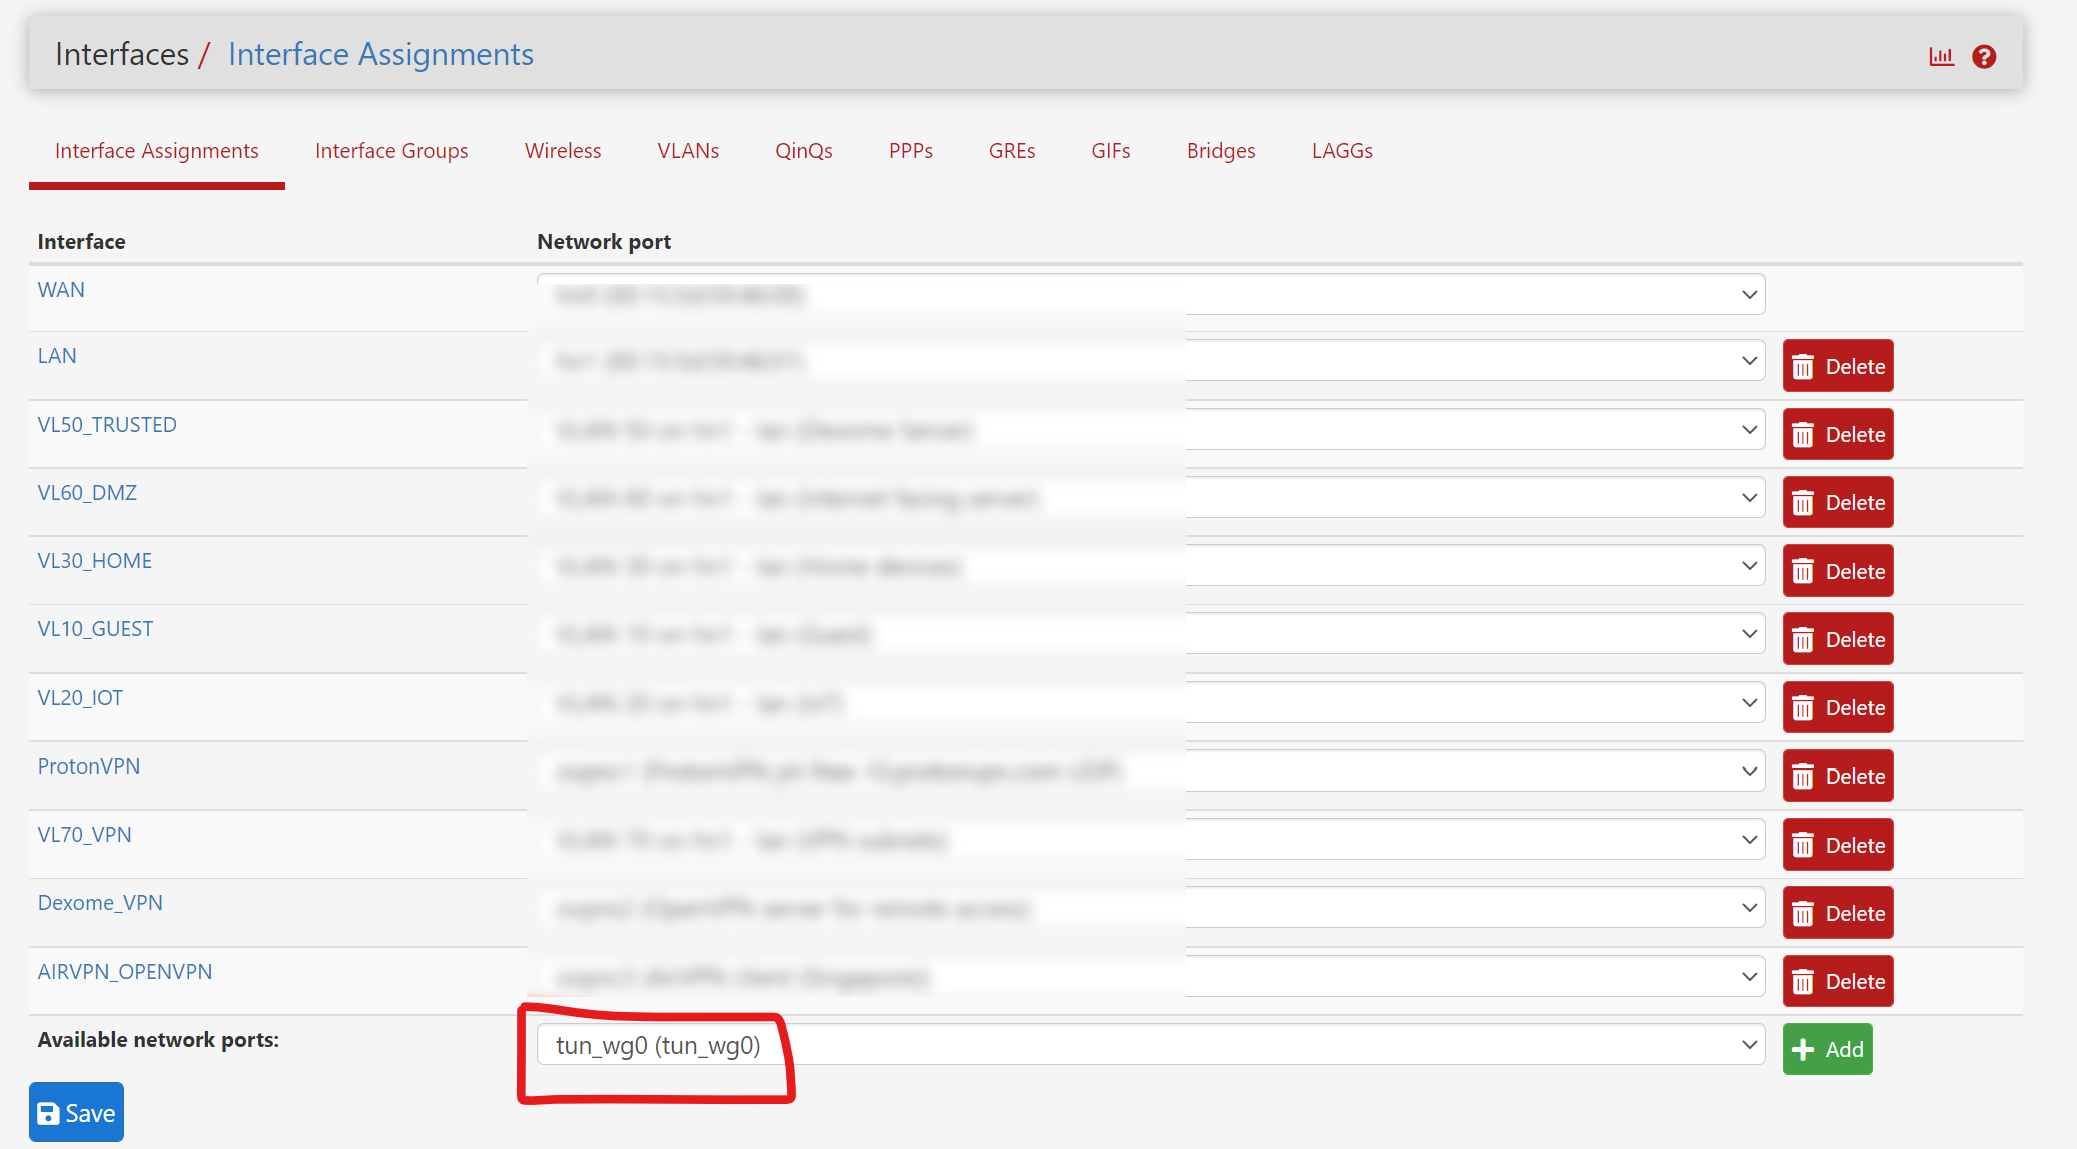
Click “Add” and you see it assigned to an interface. Click on the interface link to take you to the configuration page.
- Enter a Description, say “AirVPN_WireGuard”
- In IPv4 Configuration Type, select “Static IPv4”
- In IPv4 Address: (use the ip address from above step)
- Select
32as CIDR value - IPv4 Upstream gateway: Click “Add a new gateway”
- In the popup, uncheck “Default gateway”
- Gateway name: AirVPN_WIREGUARD_GW
- Gateway IPv4: Same ip address from above step.
- Click “Add”
The final configuration should look like this.
NAT settings
On top bar, go to Firewall > NAT > Outbound
- Select
Hybrid Outbound NAT rule generation - Click “Add”
- Enter following details with right local ip address that you want to have VPN access to.
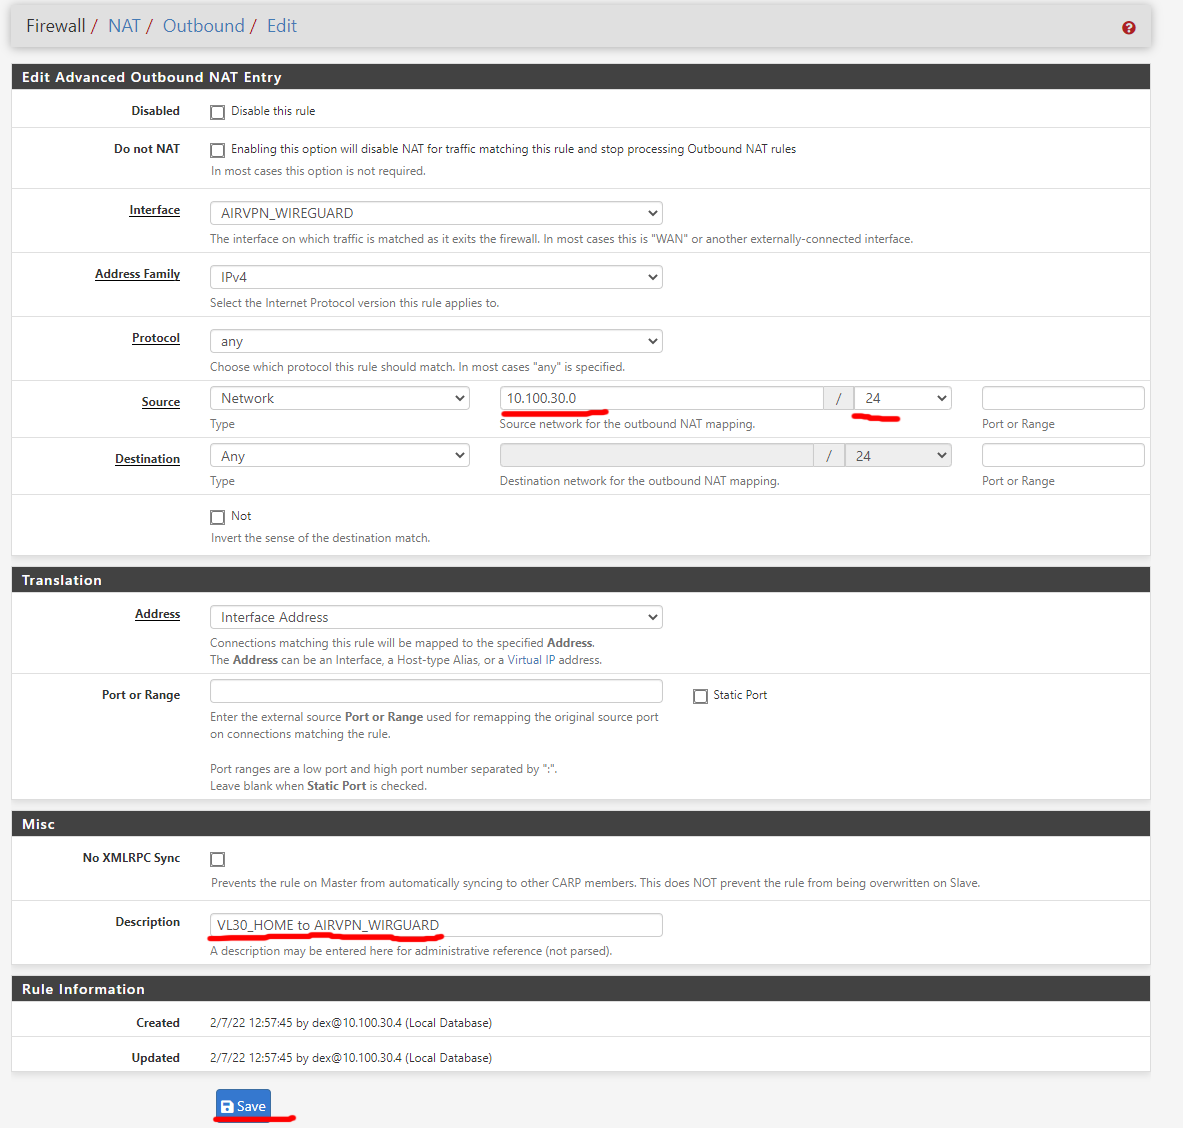
- Click
Save.
Firewall Rules
On top bar, go to Firewall > Rules > LAN
You are not limited to LAN interface. If you have configured VLANs, you can use them as well.
Set the Gateway as AirVPN_WIREGUARD_GW to the rules which want to use VPN.
That’s it, now you are done!
|
|